How to Use Texture and Space in Artistic Photos
Element #4 of Art: Wielding Color
Color is one of the 7 essential elements of art. It is created when light is reflected in the eye of a viewer of a scene or object.
There is a model that has become universal to classify colors: the color wheel. It was developed by Isaac Newton who took the spectrum of colors and folded it into a circle. This color wheel shows:
- Primary colors: they cannot be mixed.
- Secondary colors. Each of them is obtained by mixing two primary colors.
- Tertiary colors. Each of them is obtained by mixing a primary color and a secondary color.
The 3 primary colors are cyan (blue), magenta (red) and yellow.
The 3 secondary colors are green (cyan + yellow), purple (cyan + magenta) and orange (yellow + magenta).
The tertiary colors are red (red + orange), orange yellow (yellow-orange), light green (yellow + green), turquoise (blue + green), indigo (blue + violet), purple (violet + red).
Colors are said to be complementary when they are opposite on the color wheel. This is a concept that you must keep in mind because their association in your photos can attract the eye of the viewer by contrast effect. For example, red and green, blue and yellow.
Colors are said to be analogous when they follow each other on the color wheel and are composed of the same primary color. For example, yellow and red are both composed of the same primary color.
This notion of analogous colors is important to create smooth transitions and gradients in your photos.
Without going too long into this explanation of the 4th element, it seems important to me to say that there are also hot colors and cold colors.
The warm colors are red, orange and yellow.
Cool colors are green, blue and purple.
Warm colors seem to move forward. They take up more space than cold colors in a photo.
Cool colors seem to recede. They are ideal colors to give depth to your photos.
Finally, each color has properties:
- Hue.
- Intensity.
- Value.
The hue of a color refers to its name: for example, red, blue, green, etc..
The intensity of a color qualifies its purity. I am talking about vividness. A color is said to be of high intensity if it is pure, without any mixture. It is said to be of low intensity if it is the result of a mixture. Sometimes you will also hear about chroma for intensity, saturation, chrominance. All these terms qualify the same property.
The value of a color qualifies its lightness or darkness compared to white or black. For example, yellow is a light value, because it is close to white. Blue is a dark value because it is close to black. Often you hear brightness used to refer to value.
Now that you have in mind all the characteristics of colors, it is interesting to understand why to use them to create your photos.
Colors in photography are not only used to show reality. They have a real language. They allow you to give meaning to your photos. The colors can be used with a semantic purpose.
The red color is synonymous with power, energy, strength, passion, love. It can also represent danger, revolt.
The yellow color evokes optimism, joy of living, warmth and light. But it can also have negative connotations such as lying and deceit.
The green color evokes optimism, hope and growth. But taken negatively, it can evoke misfortune.
The purple purple evokes mystery, spirituality, magic, elegance. Taken in a negative way, it can evoke melancholy or loneliness.
The orange color evokes ambition, enthusiasm, energy, action. Taken negatively, it is a color that evokes excess.
The pink color evokes femininity, romance, softness, innocence. It can also evoke childhood, innocence.
The blue color evokes reliability, truth, tranquility.
The brown color evokes authenticity, naturalness. But beware, when it is dominant in a photo, it can give a bland appearance.
The black color evokes rigor, sophistication, elegance, timelessness. But interpreted negatively, it can evoke sadness, death, mourning.
The white color evokes purity! cleanliness, perfection, innocence, virginity. Taken negatively, it can evoke the lack of content, the absence of depth, and the superficiality of life itself.
The use of colors in your photos must be carefully studied.
For example, if you make photos with a strong red color, people will have a very strong instant energy. But once this phase is over, they will fall back into lethargy.
If you create green-dominant buddies, the viewers will have lower energy than with red, but they will remain active. Green also evokes the balance. That's why photos of rooms with exuberant people on display help calm them down.
In an office, pictures hung on the walls with a red dominance show power, energy.
I hope these few examples show you how useful it is to control the colors within your photos.
Element #5 of Art to Use in Your Photos: the Value
The value qualifies the brightness of a tone in the context of an image.
A tone is either light or dark. The value indicates how light or dark something is. The value is always associated with a color. The lightest value is white. The darkest value is black.
Values are relative to each other. The neighborhood of a light tone gives a dark value to a color that would have a brighter value in the neighborhood of a dark tone.
The value indicates the degree of brightness or darkness of each color. For your photographs, value is an essential element. Getting the values right is more important than getting the colors right.
Indeed, the value is what allows one to show three-dimensional shapes on a two-dimensional surface.
If you increase the value differences in your photos, you will increase the contrast. You will attract the eye of a viewer more easily. You will attract his attention. Your photos will be more interesting. Then, all you have to do is give them meaning.
The decrease in value differences will result in less contrast. Your photos will attract less attention.
When taking a picture in the field, you should try to have your focal point with as much contrast as possible to easily catch the eye of the viewer.
If you create photos with rather dark values, they will be subdued. You will evoke a heavy, mysterious, dramatic, dark feeling. These are the low-key photos.
If you create photos with rather bright values, you will give a feeling of lightness, speed, spirituality, dream, escape. These are the high-energy type of photos.
In photography, it is possible to manage the values of your photos well. It is for example, the use of the very morning light or twilight when the sun is low.
But for me, developing a photo with a computer and software is still a great way to refine the contrast. By using tools like the gradient or the brush, I can modify the values of my tones to amplify the contrast of my photos.
Element #6 of Art: Texture
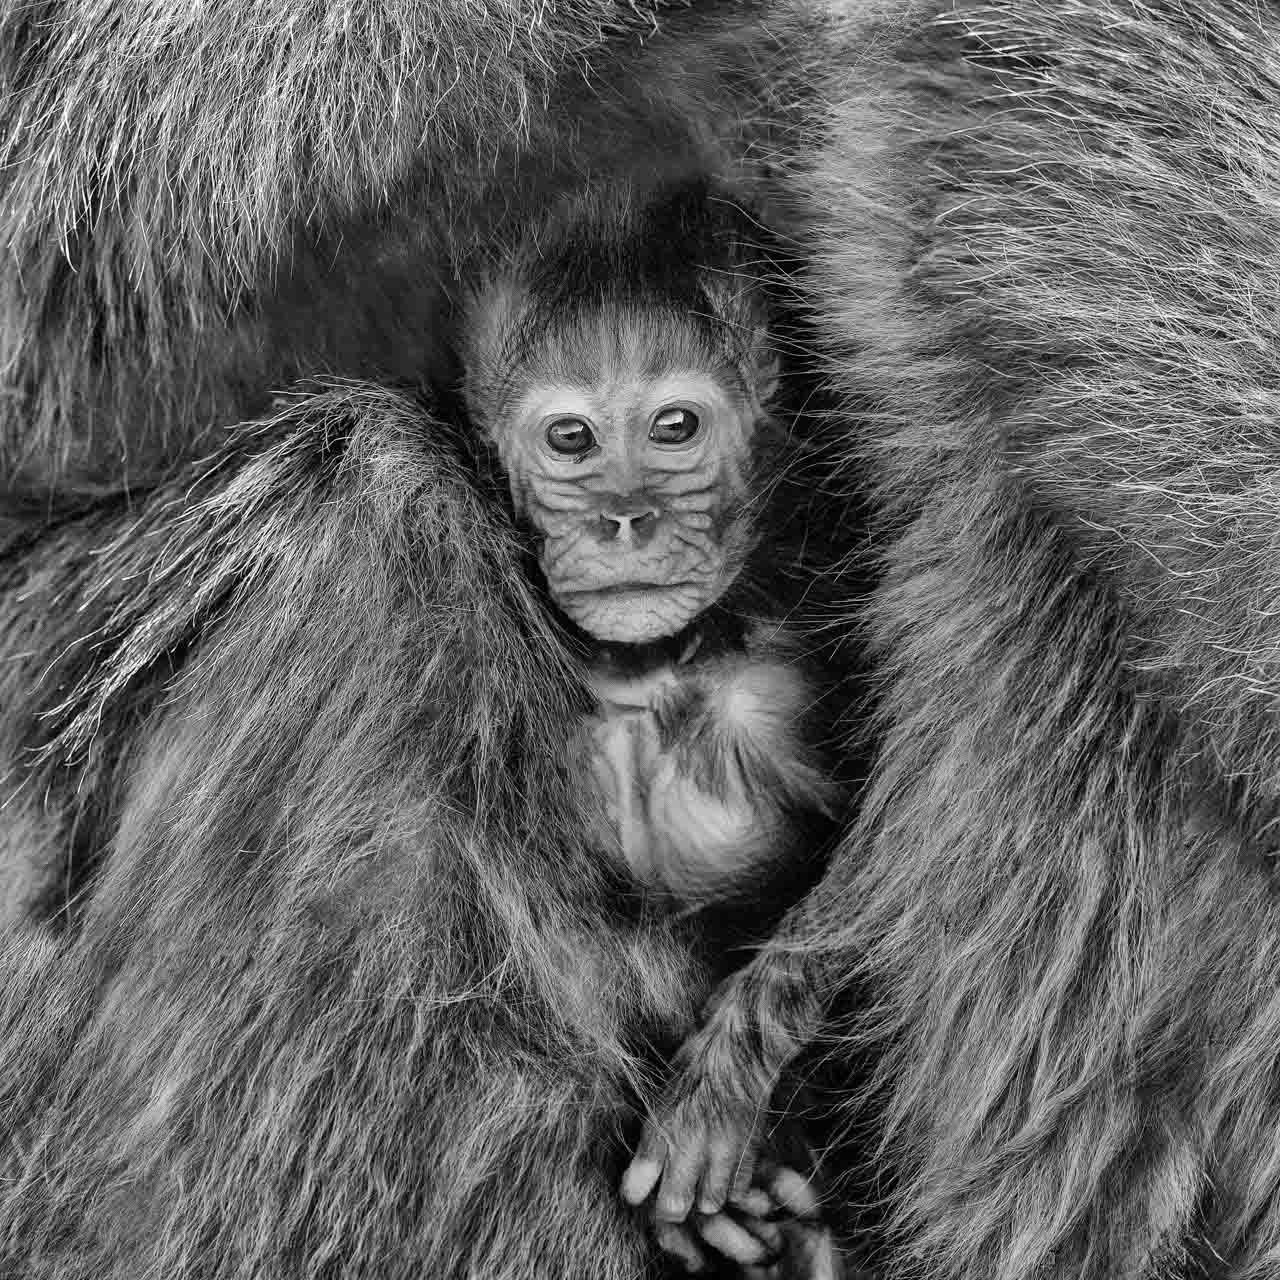
Real texture is the sensation of an object to the touch.
Your photos represent a three-dimensional world on a two-dimensional surface. It is impossible to create the effect of the textures you are photographing, whether it is the fur of a mammal, the plumage of a bird or the roughness of a tree trunk.
You can evoke it with the texture of the paper you use when printing your photos, but that is not the subject of this paragraph. To convey the illusion of real texture to the viewer, you must pay attention to your color values and light. Indeed, every textured surface in nature will reflect light in a very particular way. You need to pay attention to this to be sure and reflect the textures right.
You must always have in mind that the texture in your photos must evoke touch. You almost have to provoke in the viewer this desire to take or to touch your photographic subjects.
In photography, textures are visual and therefore implicit, unlike in other art forms such as sculpture or architecture. Textures can be smooth, rough, hard, soft, hairy, bumpy, etc.
Element #7 of Art to Use in Your Photos: the Space
Here we come to the last element used in art. It is as essential as the others. So far I have explained lines, figures, shapes and then color, value and texture.
Space is defined as the placement of lines, figures and shapes.
In art, there are two types of space:
- Positive space.
- Negative space.
The positive space is the space occupied by your subject and everything related to it such as its shadow or secondary subjects that help to better understand a work.
Negative space is the space that extends around your subject as the foreground and background.
In wildlife photography, the positive space is the animal if it is alone in the picture. The rest is the negative space. Often, it characterizes its habitat.
In landscape photography, the positive space is the subject or the point of attention of the photo. The negative space is made up of all the elements that will contribute to emphasize this point of attention.
In photography, this concept of space is essential. Indeed, you can analyze a photo by breaking it down into 3 elements:
- Foreground.
- Background.
- Subject.
You can also break it down into spaces:
- Negative space
- Positive space.
You can judge a photo by judging the elements or spaces.
If you wish to learn more about judging elements or spaces, feel free to discover more on this page.
For me, negative space is essential. Indeed, I realize very few close-ups. My photos are often wide shots. This way of photographing corresponds to my photographic approach. When I photograph a subject, it occupies little space in the photo. I must manage the negative space well.
Here are some questions I ask myself when I take a picture:
- Is my subject breathing? Do I leave enough negative space around my subject?
- Does my negative space need to be balanced on each side of the subject?
- Should I reduce my negative space because it is too eye-catching?
- etc.
The management of the space or of both spaces (negative or positive) is essential to understand for you. The better you understand them, the better your photos will be.
You will improve the placement of subjects in your photos. You will understand how to use perspective.
You will be able to create effects by establishing size references, for example.
You will also be able to better manage the colors and values. For example, I recommend that you use cool colors in the background to give an idea of escape and infinity. Dark values are interesting for the foreground where they give the impression of a walk that literally appears to enter into the photo.
Finally
I hope this article about using the 7 elements of art will give you new creative ways to make your photos.
Whether it is a line, figure, shape, color, value, texture, space, each element is essential to analyze, understand, and master.
They are the basis for creating interesting and balanced photos. By playing and modulating these elements, you will write stories with your photos. You will give them meaning. You will be understood. They are the basis of the language and writing of photography.
Please take the time to read this article again. It is one of the foundations of your photographic approach.
Be humble, patient, constant, persevering, and persistent because the road to excellence is long.
")
")
Add comment